
630-735-3500
Akron Brass Company
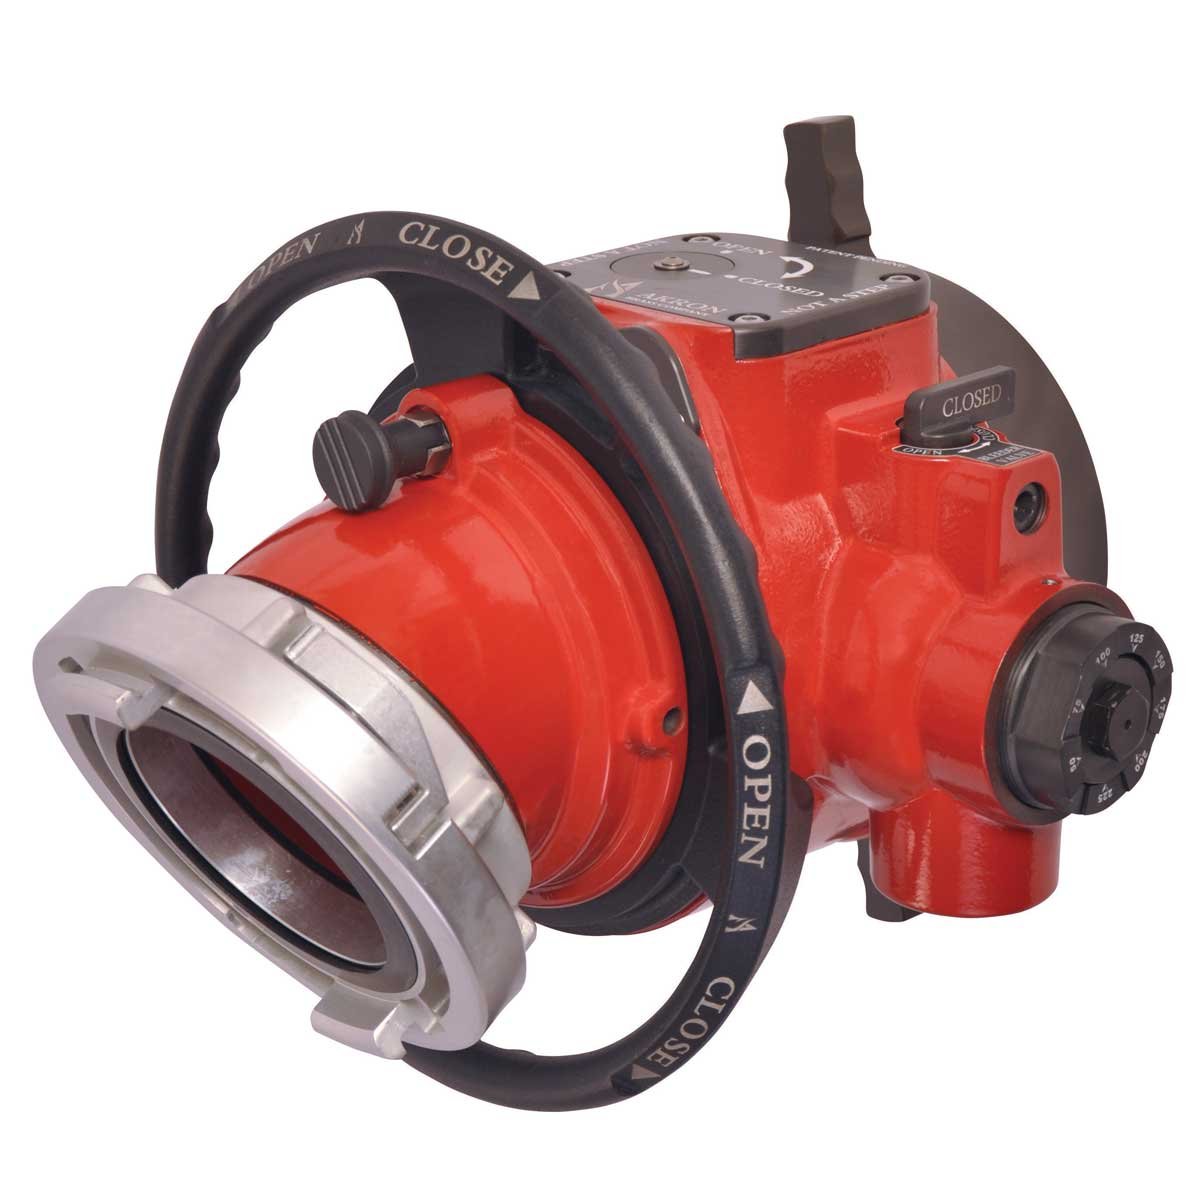
Revolution Intake Valve
Compact and efficient, the Revolution Intake Valve is available in various inlet sizes (4", 5", 6") and types (straight or swivel elbow), with multiple outlet options, designed for optimal space-saving and ease of operation.
Looking for a quote? Simply add your items to the cart and choose Request for Quote during checkout.
Enter a value between 1 and 100000000 in increments of 1.
Earn Darley Dollars with this purchase
The Revolution Intake Valve is engineered to save valuable space on your pump panel with its compact design. The innovative handwheel blends seamlessly with the valve body, ensuring it does not obstruct surrounding equipment, thereby enhancing the operating environment for your firefighting team.
Features
- High Flow Capacity: Capable of up to 2000 GPM (7600 LPM), ideal for demanding intake applications.
- Versatile Inlet Options: Available in 4", 5", and 6" sizes with straight or swivel elbow types.
- Multiple Outlet Options: Choose from 5" or 6" rocker lugs, and 5" or 6" female long handle outlets.
- Integrated Handwheel: Pyrolite patent-pending design for easy operation.
- Non-Corrosive Components: Critical pump side waterway parts are made from stainless steel.
- Durable Finish: Powder-coated interior and exterior for enhanced durability.
- Adjustable Relief Valve: Field adjustable between 50–250 psi, includes a 1-1/2” NPT female thread for hose connection.
- Quick-Turn Bleeder Valve: Efficient venting into relief discharge.
- Position Indicator: Built-in indicator for open/close status.
- Field-Serviceable Design: Easy maintenance and serviceability.
- NFPA 1901 Compliant: Meets industry standards.
- 10-Year Warranty: Against manufacturing defects and corrosion.
Installation Instructions for the Revolution Intake Valve
Tools Required
- Wrenches or spanners for tightening connections
- Brackets or straps for securing the valve
- Lubricants for moving parts
Preparation
- Inspect Components: Ensure all parts are clean and free from debris.
- Verify Compatibility: Check that the valve and hoses match your setup.
Positioning
- Place the Valve: Position the valve in the desired location, ensuring accessibility.
- Align Connections: Make sure the inlet and outlet connections are correctly aligned.
Connecting the Inlet
- Attach Hose: Connect the large diameter hose (LDH) to the inlet connection.
- Secure Connection: Use the appropriate coupling (Storz or NST) to secure the hose.
Connecting the Outlet
- Attach Outlet Hose: Connect the LDH hoses to the outlet connections.
- Ensure Tightness: Make sure the connections are tight to prevent leaks.
Securing the Valve
- Use Brackets or Straps: Secure the valve in place, especially in mobile or high-pressure applications.
Testing
- Open Valve Slowly: Allow water to flow through gradually.
- Check for Leaks: Inspect connections for any leaks or irregularities.
- Test Relief Valve: Ensure the pressure relief valve is functioning correctly.
Final Adjustments
- Adjust Position: Make any necessary adjustments to the valve or connections.
- Ensure Smooth Operation: Confirm the valve operates efficiently.
Tips for Installation
- Safety Gear: Wear appropriate safety gear during installation.
- Manufacturer Guidelines: Follow the user manual for specific instructions and safety precautions.
- Regular Maintenance: Perform regular maintenance checks to keep the valve in optimal condition.
- Inlet Options: 4" Storz, 5" Storz, 6" Storz
- Outlet Options: 5" Rocker Lug, 6" Rocker Lug, 5" Female Long Handle, 6" Female Long Handle
- Dimensions: Varies by Type
- Straight: 12.5” x 14” x 12.75” (318mm x 356mm x 324mm)
- Swivel Elbow: 12.5” x 14” x 14.875” (318mm x 356mm x 378mm)
- Pressure Relief: Adjustable between 50-250 psi
- Operating Pressure: 250 psi
- Friction Loss: 7 psi at 2000 GPM
- Weight: Varies by Type
- 38 lbs for straight inlet
- 40 lbs for swivel elbow
- Material: Aluminum/Stainless Steel
- Brand: Revolution
- Depth: Varies by type
- 12.75" for straight inlet
- 14.9" for swivel elbow
- Flow (GPM): 2000
- Flow (LPM): 7600